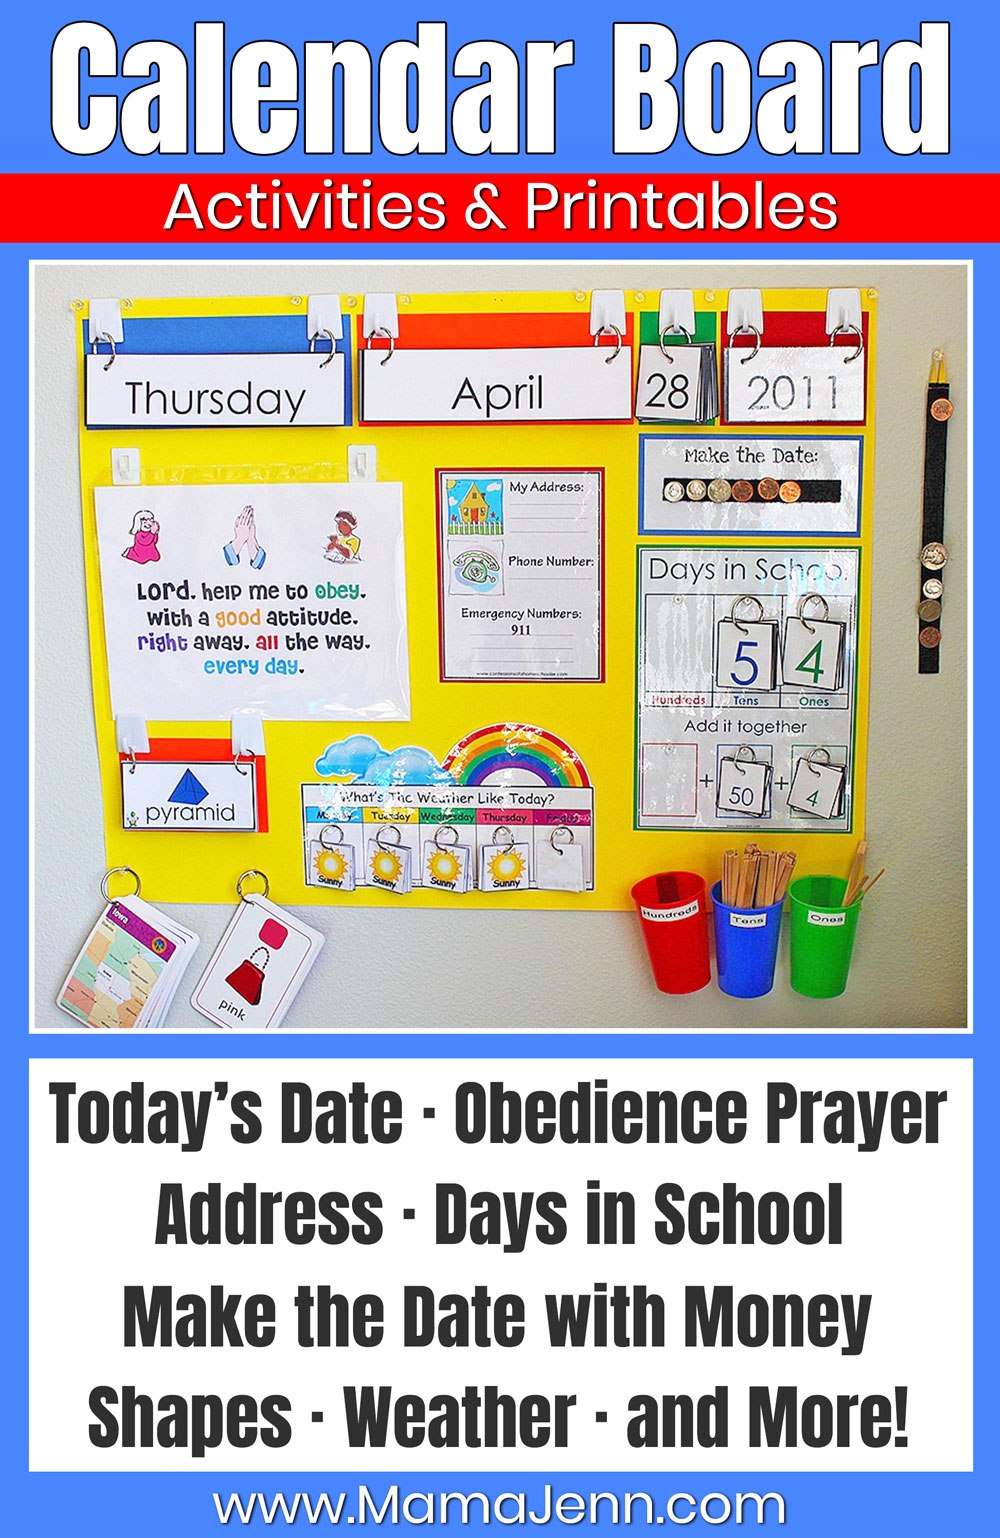
Want to add a calendar board to your schoolroom? Set it up quick & easy with these Calendar Board printables!
We have been using Calendar Time as part of our morning homeschool routine for quite a while now. While we are still using our calendar notebooks (I love that the notebooks provide individual calendar work for each of my kids), I have since made some improvements to our old calendar board that have really streamlined our Calendar Time. I LOVE our new calendar board set up and I am excited to share it with you!!!
This page may contain affiliate and/or advertiser links. Please review my disclosure policy.
The main change with our NEW calendar board is that it is now made up of a bunch of “flip charts” on metal rings. So, I don’t have to keep up with anything because everything we need is right there on the board! No more missing pieces…no more having to remember to set the pouches out each night…etc.
How We Use Our Calendar Board
Each day the kids still do their calendar notebooks and they take turns updating the calendar board. As opposed to me going over the calendar board, the person who updates the board also get to “teach” (i.e. go over the updates on the board.) As they go over the calendar board, the others follow along in their calendar notebooks. While I sit in on the kid’s teaching, I glance over their calendar notebooks.
So, want to make your own calendar board? I’ll provide all the details below!
Calendar Board Supplies:
- calendar board printables (download links below)
-
poster board
-
colored paper
-
hole puncher
-
thumbtacks
-
plastic adhesive hooks (from the Dollar Tree)
-
plastic cups (from the Dollar Tree)
How To Make the Calendar Board
First, prepare all of the elements you want to include on your board. Print, laminate, cut, and hole-punch all of the pieces.
The board itself is just a piece of poster board. Design the board by deciding where everything will be placed.
Use construction paper to add more color to the board. Use adhesive hooks and thumbtacks to hang the rings onto the board.
I’ll continue by explaining all of the different parts of the board and tell you where to get them and how we use them!
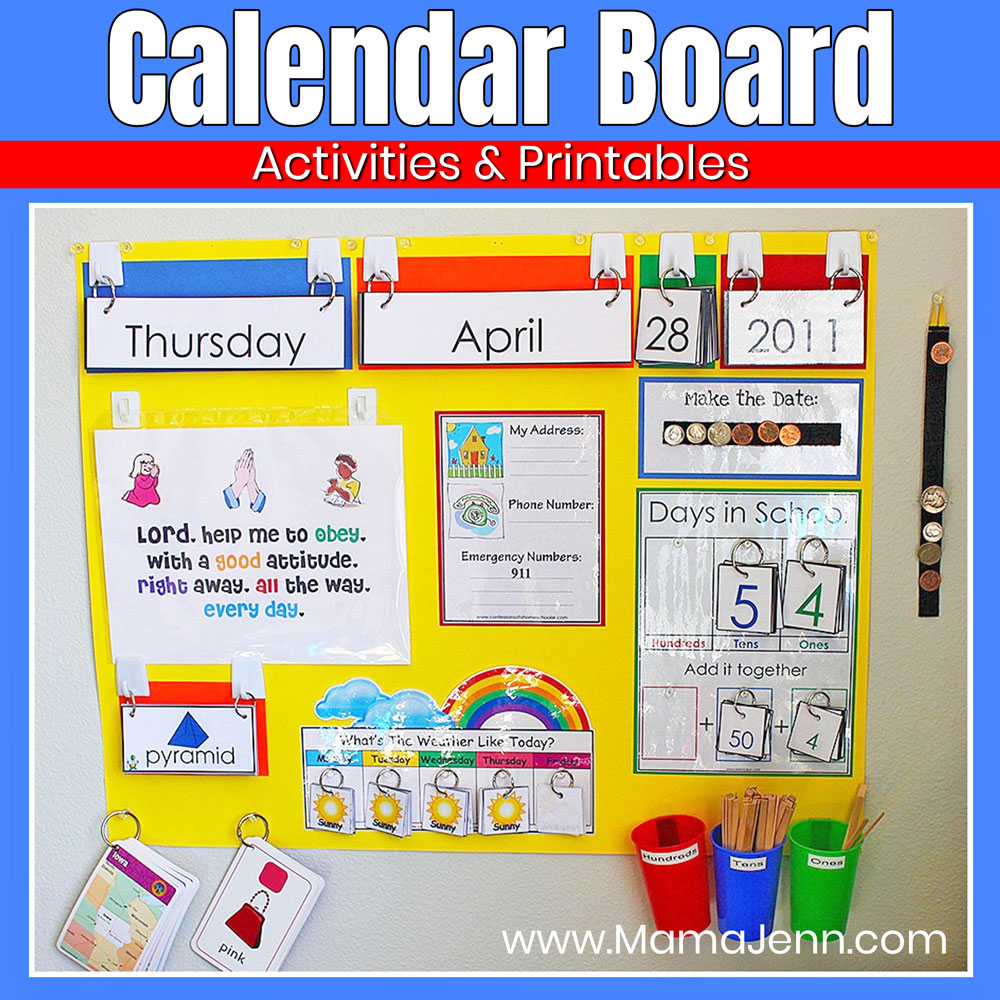
Today’s Date Calendar Board Printables:
I created the Today’s Date printable (available for purchase below) with all of the days of the week, the months, numbers, and years (through 2036). Plus, you can choose between two different fonts! (Click the Buy Now link to visit my shop and view the two font choices.)
Cut and place the Today’s Date pieces on round metal rings. Each morning the kids flip the cards so that the appropriate date is displayed. All of the pieces are laminated for durability.
Purchase the “Today’s Date” printable Right Here, Right Now:
Want to add the Today’s Date printable to your calendar board? You can add it to your cart and buy it right now!
OBEDIENCE PRAYER:
I downloaded this from Totally Tots. I slid it into a page protector. Periodically I change it out and slid in other pages for my kiddos to go over.
MY ADDRESS:
I downloaded this from Confessions of a Homeschooler. Although it is not filled in in the photo, it now has our new contact info on it so that the kids can learn our new address and phone numbers.
MAKE THE DATE WITH MONEY:
This is from our old calendar board. I simply adhered a strip of velcro onto the board to display the date in coins. For example, if the date is April 28th, there should be 28 cents displayed on the board. The extra coins hang on a strip of velcro on the side. FYI, there are velcro dots on the back of the coins so that the kids can practice with real money.
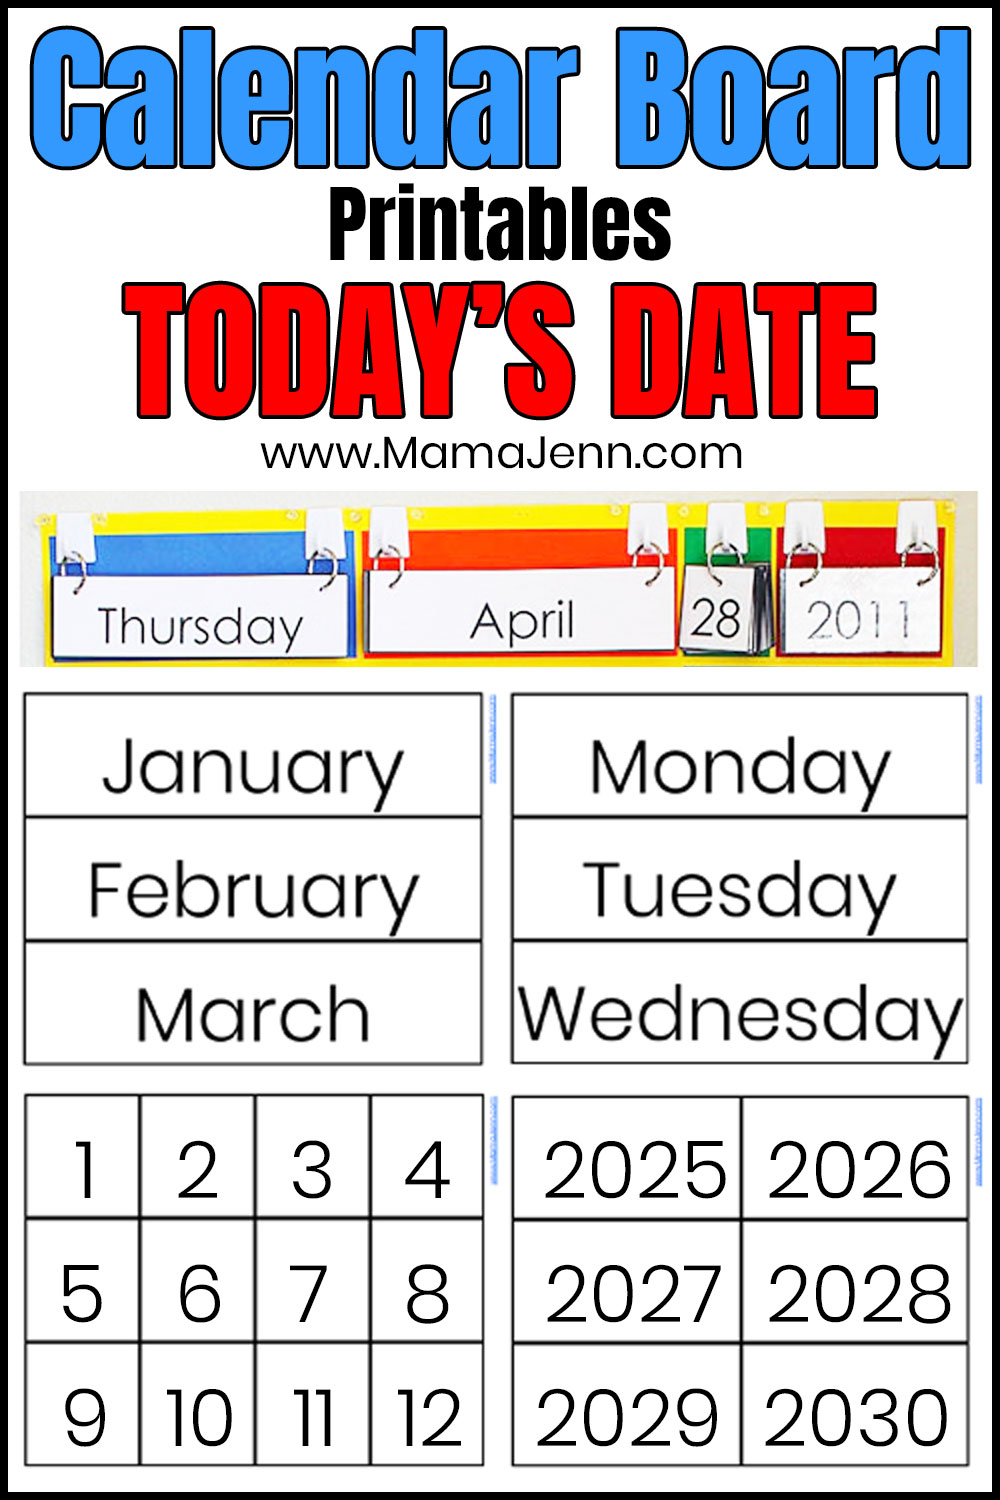
DAYS IN SCHOOL Calendar Board Printables:
I was inspired to create the Days In School printable (available for purchase below) after seeing it on Homeschool Creations. However, I created my own version of the printable and the numbers so that there was enough space to hole-punch them and hang them on the rings. The rings are hanging from thumb tacks. All of the pieces are laminated for durability.
We keep track of how many days we have been in school…while working on place value at the same time. I love the visual aspect of adding the cups underneath it. (Cups are attached to the board with velcro.) The kids add a stick for each day. Once they have ten sticks in the cup labeled “ones”, we rubber band them and move them to the cup labeled “tens”…and so forth. I wanted to use plain ole popsicle sticks, but my cups would not hold enough of them. So, I used these smaller sticks instead.
Purchase the “Days in School” printable Right Here, Right Now:
Want to add the Days in School printable to your calendar board? You can add it to your cart and buy it right now!
SHAPES:
I downloaded the shape cards from TLSBooks.com. (Click the link and scroll down. Click on Shape Flash Cards to download.) This time I included the 3D objects. I printed them, laminated them, hole punched them, and added them to rings.
FLASH CARDS:
See the bottom left corner on poster board. I hole punched a few sets of flashcards (colors & states) that we go over as well.
WEATHER:
I used the download from Confessions of a Homeschooler. Each set of rings has all of the possible weather choices on it. We start the week with all of the cards turned facedown. Each day they turn over the cards and flip through to find the appropriate card to represent the day’s weather. All pieces are laminated for durability.

CALENDAR:
We still use our calendar (shown above)…just as before. (We purchased if from the Dollar Tree but you can find similar calendars here. There are velcro dots on each box on the calendar as well as on the back of each number card. The bag that holds the extra calendar numbers is attached to the side of the board…as is the bag of extra wooden sticks for the place value cups.![]()
So, hopefully that gives you a better idea of our new calendar board setup. I am LOVING that everything is all in one place. It is SO much better than what we had before! Plus, the kids get a kick out of all the little flip charts!
More Calendar Time Links:
More Calendar Time Ideas:
This post was originally published on May 31, 2011.
Angie Brill
I love you calendar! Can I purchase the calendar set and weather ?
Mama Jenn
Thanks Angie! The weather printables were created by Erica at Confessions of a Homeschooler. Just scroll within the blog post to where it says “Weather” and click on the link to Confessions of a Homeschooler to get to the printable.
As for the actual calendar (with the apples) – I purchased that from the Dollar Tree years ago. I believe you can still purchase similar calendars from there now.
Mama Jenn
You are so welcome! Glad you will be able to use the printables!
Thi Nguyen
Thank you so much for taking the time to post this, Jenn! I absolutely love how well organized and interactive it is! I just graduated and will be a first year Life Skills (Special Education) teacher in January 2013! Your calendar board will definitely help me to become a great educator to my classroom of students with special needs! Being able to print everything without having to resize or anything like that is such a time saver! Thank you for being such a blessings!
Mama Jenn
So glad it’s working for you Jen! Using the cork board is a GREAT idea!!! I hadn’t thought of that!!!
Jen
Thank you SO much for creating this and allowing us to print each part. I made a calendar board for my girls and it’s hanging in our homeschool room thanks to you. They love it! I used an old cork board I had instead of poster board. It turned out awesome. Thanks!
Mama Jenn
Awh, thanks so much!!!
verybusysupermumma
Hi there, LOVE LOVE LOVVVVVVVVE your work!!!
Mama Jenn
No prob!
Mama Jenn
The shape and color flashcards were more for my little guys. They would select a color and a shape and then tell me various objects around the room that matched the shape or color. For the state flashcards, my older kids would locate it on the wall map and then tell me what they know about the state. Then we would read the facts on the flash card. Hope that helps!
Jana
Quick question…How do you use the state/color/shape flashcards? I’ve been searching your various calendar posts, but haven’t found the answer yet. 🙂
Tchnnut
Thanks so much for sharing! Just what I was looking for!
Mama Jenn
Yay! You are most welcome!
Jmulderink
It worked perfectly this time! Thank you again!
Mama Jenn
Thanks for letting me know about the file! I have re-uploaded it to the site and it should print fine now. Please let me know if you continue to have trouble with it.
Jmulderink
I love your calendar set up! I was going to use your printables to improve my calendar time, but I am having trouble getting the second page of the days in school pdf to print. All of the numbers print out, but not the page with the days in school chart. Would you possibly be able to send me this page via email? My email is [email protected] if you can! Thank you, you are an inspiration!
Gretchen
I love it. I just redid our’s with your’s as the inspiration. Thank you!
Mama Jenn
I think I got the hooks from the Dollar Tree and the rings from Michaels.
~ Jenn
BethanyJudge
Where did you find the rings and hooks? I would LOVE to set this up!
Mama Jenn
I’m all about saving some $$$! LOL!!! Glad I could help! 🙂
MommySoup
I’ve been looking at the professionally done “circle time” charts for a while now and couldn’t justify spending the $80 for one. You have officially saved me! I even have most of this stuff sitting around at home. Genius! Thank You!
Mama Jenn
Hi Claudia! You know, it wasn’t a direct download for the Obedience Prayer. I right-clicked it and saved the image on my computer. Then I printed it out. The image is from this Totally Tots post: http://totallytots.blogspot.com/2010/02/from-tots-to-teens-his-love.html
Hopefully this will work for you!
claudia garcia
Hello, I love your new Calendar! I have been looking for that Obedience Prayer and I can’t find it. I found the alphabet one but I love that one on yours. How can I download that one or is it that maybe they don’t have it anymore?
Mama Jenn
Great! So glad you will be able to used the calendar materials with your class!!!
Lena Wessel
As a kindergarten teacher with lots to do and lots of little bodies to do it with, this idea is fabulous. I downloaded and made everything this weekend, and I can’t wait to see the kids’ response! They will love it. Thanks!!
Mama Jenn
You are so welcome Amanda! 🙂
Amanda
This is brilliant! I have been collecting calendar board ideas and was about to go get the materials and start printing away. I never imagined the hassles associated with all those pieces. I’m SO glad I found this before went through that headache! Thank you for all you do in offering your advice, wisdom and printables. I really appreciate it from the bottom of my heart!!!!
Kamilah Sayyidi
Thank you for the inspiring me!
http://noorjanan.blogspot.com/2011/08/our-family-circle-calendar.html
Mama Jenn
Thanks so much! Great idea with the yesterday, today, and tomorrow!
rachel
I love your Calendar and am making notebooks for my girls. I thought of another one using a trading card page. Yesterday, Today, Tomorrow with days of the week cards. Keep up the amazing work!
Mama Jenn
Thanks Tamara! Headed over to check it out now! 🙂
All of a Kind Family
Thank you for sharing this! We made one a while back and have been enjoying it already during our first week of school. I just posted a link to it on my blog with a picture.
Mama Jenn
I will be moving them off of 4shared and onto my website so that they can be accessed. I will make an announcement on Facebook once I am able to make the switch. I apologize for the inconvenience!
Etta
I’m new here, but I love the calendar notebook idea and would love to use it for my kids! Unfortunately, I can’t get any of the links to your documents at 4Shared to open. Help!
kamariden
How do you keep your kids from playing with your calendar area between updates?
Mama Jenn
kamariden~
Not sure why, but I have not had a problem with the kids playing with the calendar between updates. They usually don’t bother it at all.
kamariden
How do you keep your kids from playing with your calendar area between updates?
Monica
Wow this is NICE.. thanks for sharing!
Monica
Jade =)
Ok, had to share that I created mine a few days ago, heavily inspired by yours (and using your date printables and ring idea!) See it here: http://heyitsjade.blogspot.com/2011/06/homeschool-mothers-journal-its-summer.html Thank you so much!
Danae Farias
I love this! Visiting your blog is always so invigorating & inspiring. I’ve been wanting to revamp our calendar time-I might have to borrow some ideas =)
Sincerely,
Danae@Believing Unbeliever
Lori
I’m starting to homeschool in the fall and this is my favorite for calendar time, thank you for sharing your ideas!
Jade =)
Love! I am looking up ideas to create a board like this, and yours gave me great inspiration. I love the date at the top with the rings, and am soooo going to use your download. Thank you! I have been fumbling around with little individual numbers in a bag and it’s time consuming to hunt down the right one. The rings are brilliant, thank you!!! New follower for sure!
Ticia
Isn’t it funny how we’re constantly tinkering with stuff?
Julie
Love this! My son will like the flip rings better than digging through pouches (plus my pouches are looking pretty ragged). Thanks so much for sharing!!
Carisa
Oh Jenn, now I have to redo mine for a 3rd time. RINGS=awesome.
Mrs. Hewett
Jenn,
This is awesome! Digging the pieces out every day was so frustrating to me too. I’m off to read about your new calendar setup – excellent solutions! Thanks so much for sharing.
Karen
A. Olinger
The rings are ingenious! I skip calendar time at least half the time because I have to dig out all of the envelopes of different cards. I’m definitely going to try this! Thanks, Mama Jenn!