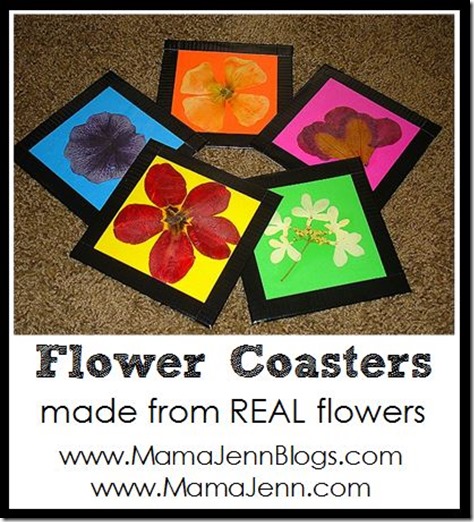
After making our leaf coasters in the fall, we made snowflake coasters in the winter. I just love how all of our coasters look and the kids love to use them! So, now with all the pretty flowers around, we, of course, decided to make flower coasters for spring/summer.

Supplies: To make your own flower coasters, you will need:
- pressed flowers
- craft foam
- clear contact paper
- color duct tape
Instructions: First, we found some really pretty flowers and pressed them between some big books for a few weeks or so. (You probably don’t have to press them for so long…we just forgot about them…LOL…until a few days ago!) Anyhow, we cut the foam into a 4.5 inch squares.
Next we placed a flower on each foam square. Then we covered the square (with the flower on it) with the contact paper. Next, trim off the excess contact paper.
Finally, tape each side of the foam square with duct tape by wrapping the excess on the back side.
This was a fun and easy project and you end up with some REALLY cute coasters!!! Thanks to Valerie at Frugal Family Fun Blog for first posting her leaf coasters and inspiring us to come up with all of our other coaster ideas!
I am linking this up with the ABC123 Show & Tell Blog Hop and the Ultimate Alphabet Craft Collection.

 Our 2010-2011 Curriculum Choices
Gina Guappone Kimmel
What a fun and easy craft idea! I love that you’ve made them for different seasons! Thanks so much for sharing…I found this on Totally Tots Crafty Corner!
Criss Kulmar
Such a great information and I’ve been looking for this..
Cindy
What do you think about allowing us to use this as a guest post at http://ShiningDawnBooks.com??
We would include a photo/bio of you and link to your website. :o)
K-tribe
This is so pretty! This would be a good idea for the fall leaves too!
Monica
Beautiful.. I was wandering what to do with some roses I have pressed in a book! Thanks!
Rebekah Smith
these are beautiful!:-)
thank you so much for letting us see!:-)
rebekah:-)
TheRockerMom
How lovely! I’ll have to try this with my little one. Thanks for sharing!